Usage
Chat with AI

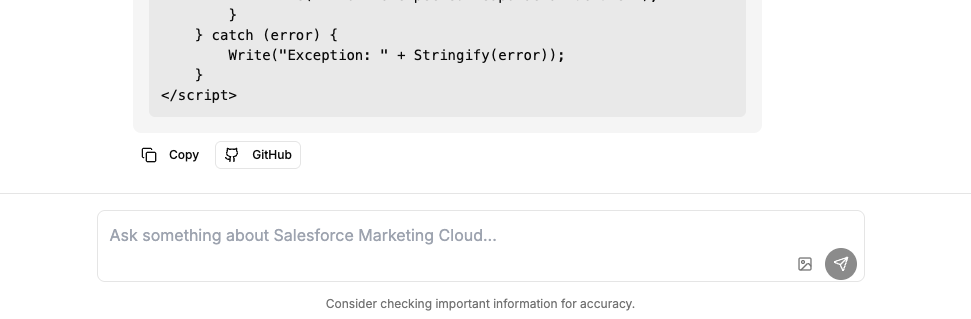
You can start by writing your request directly into the input box. For example, “create a DE with name and surname fields”. You can also include images as part of your prompt if relevant.
Important: There’s a character limit of 5000 for each message.
The AI will generate a valid code snippet based on your prompt. If you’ve selected a predefined operation (such as “Create Data Extension"), the response will include only the required code — no comments or explanations — so it’s ready for GitHub deployment.
Use the GitHub button to open the save-to-repository dialog.
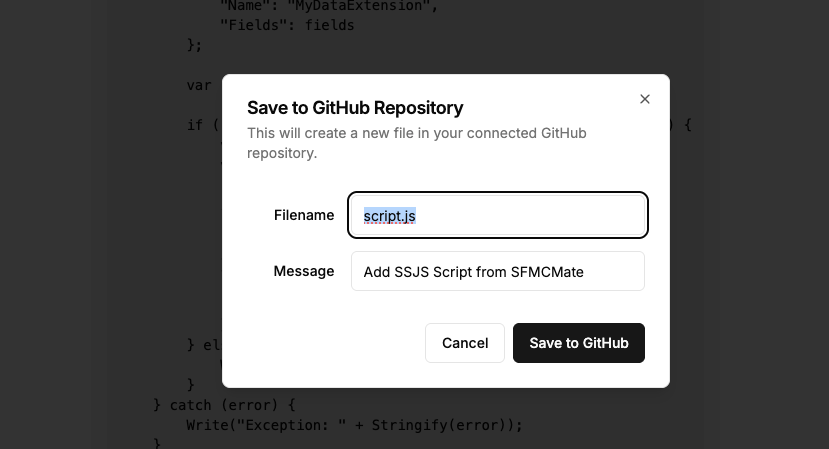
In the modal, based on the code snippet, the file name will be either script.js or page.html. You can change it but then you have to adjust CloudPage code based on it.
Then, enter a commit message and click “Save to GitHub” to push the file to your repository.
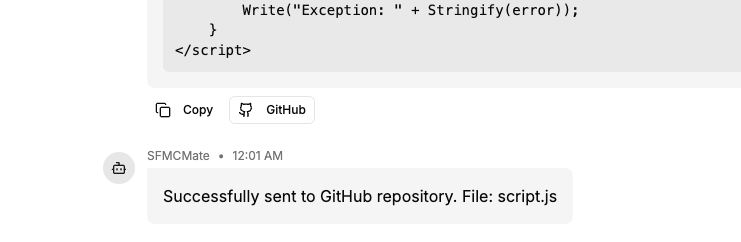
Once the code is sent, you’ll see a confirmation message with the file name.
If you have a CloudPage set up to auto-deploy from this repo, just refresh the CloudPage to see your changes in action.
Installation
GitHub Setup
Step 1: Logging with Github

Click Login with Github to get a redirection to Github.
Step 2: Authorizing SFMCMate to create a user and login
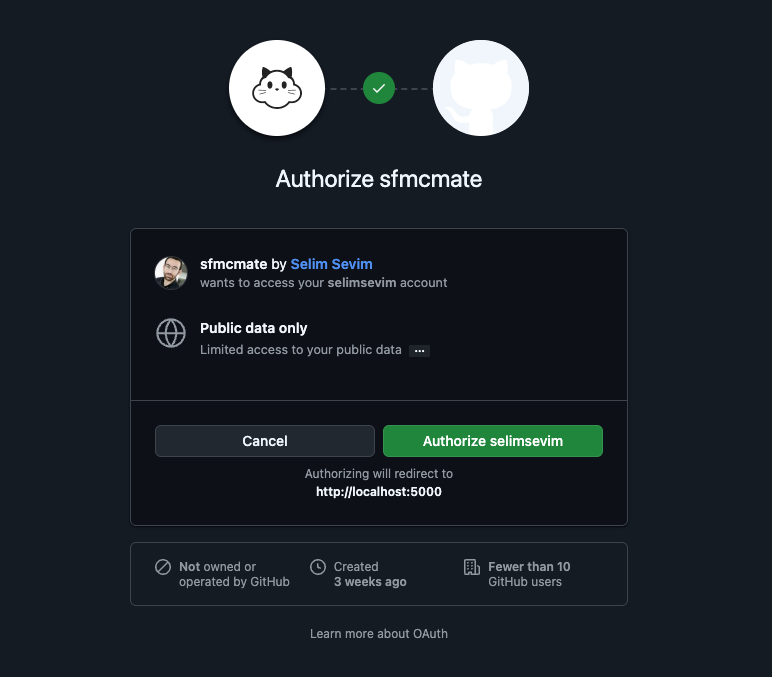
Click Authorize [username] to give access.
Step 3: Reading and Accepting the terms and conditions
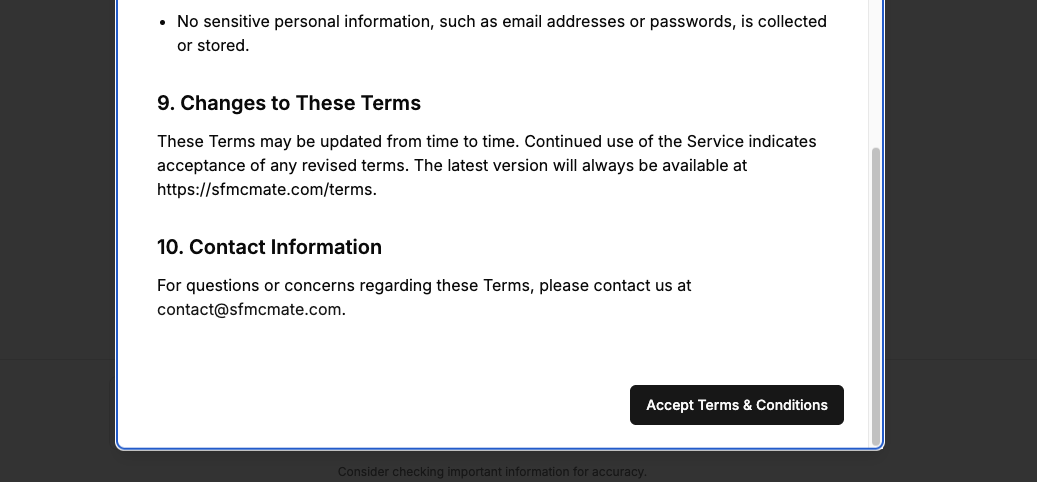
Once redirected to SFMCMate, you'll need to review and accept the Terms & Conditions to start using the Chat AI.
Step 4: Installing the SFMC Github App
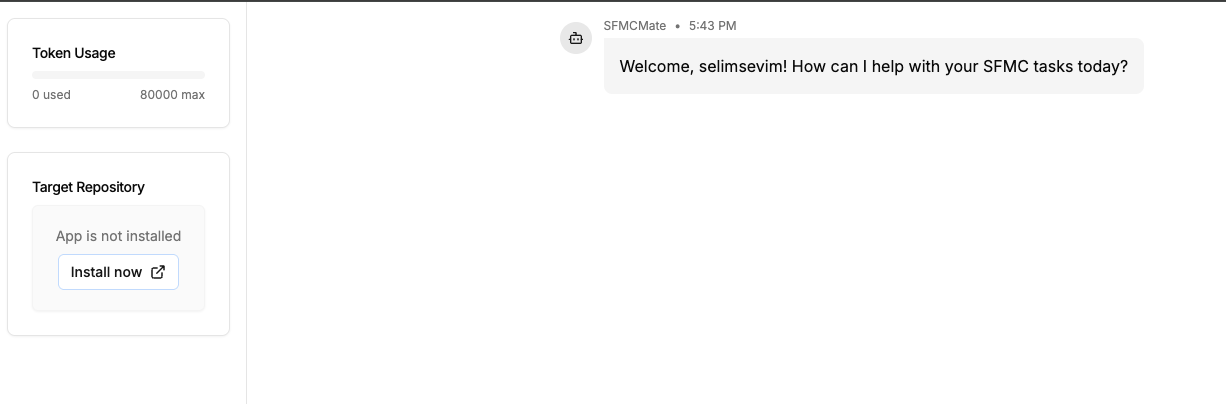
Click Install now to return to GitHub to review the app.
Step 5: Installing the SFMC Github App

Click Install to choose a repository where you'd like to use SFMCMate.
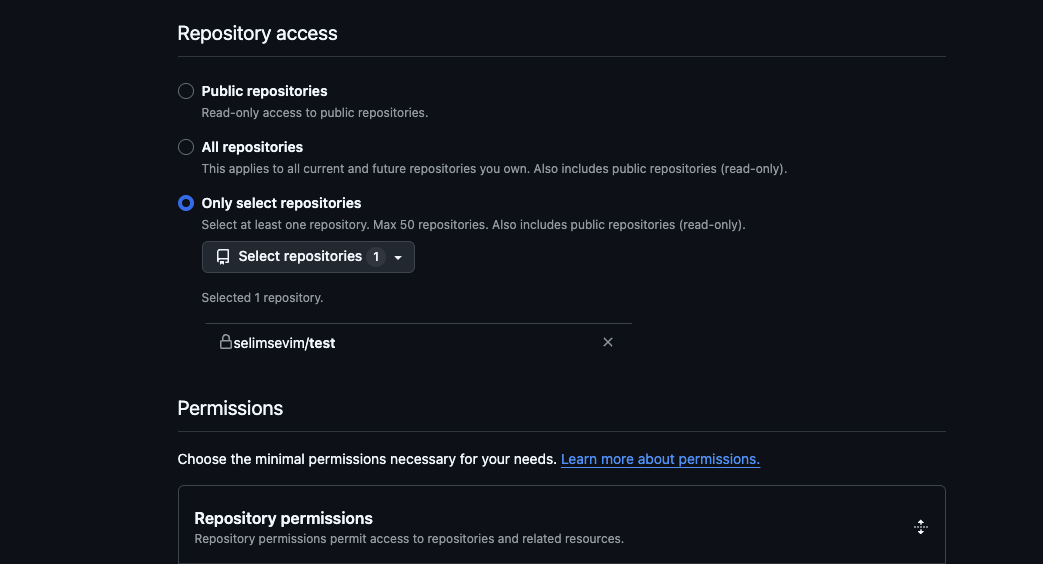
Step 6: Installing the SFMC Github App

Select a dedicated private repository that you don’t use for any other purpose and click "Install".
Please do not select all repositories!
Even if you do, only the latest repository will be used — but this could introduce a security risk.
Always pick a specific, unused repo.
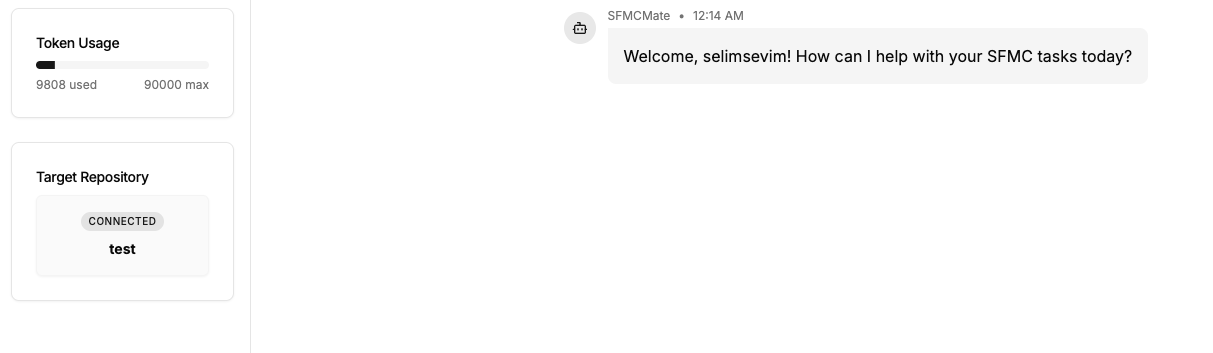
Step 7: Refreshing the chat page on SFMCMate
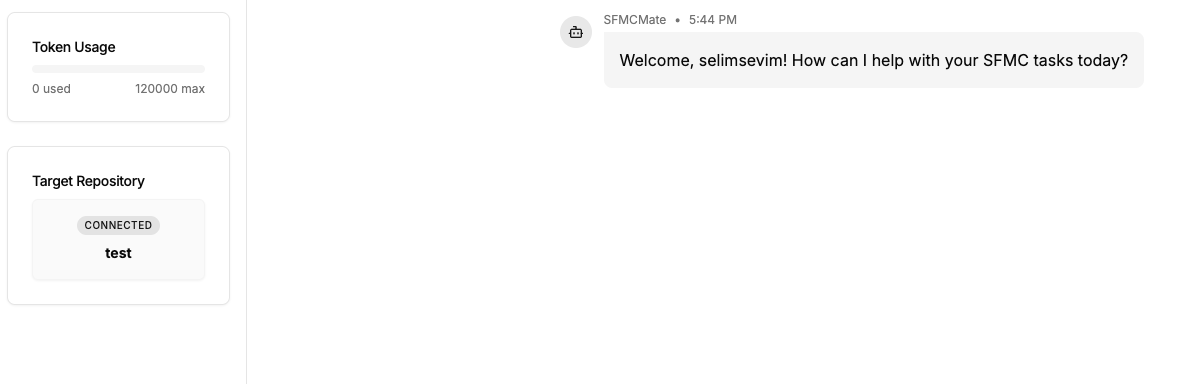
Refresh the page to check if your Target Repository is now connected.
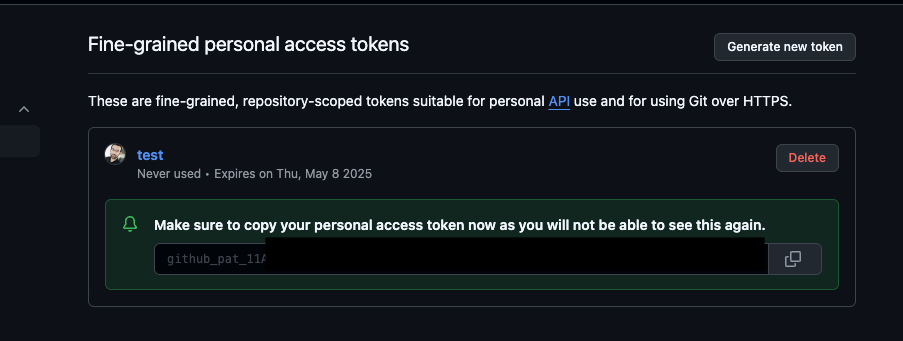
Step 8: Creating a Github token for SFMC access
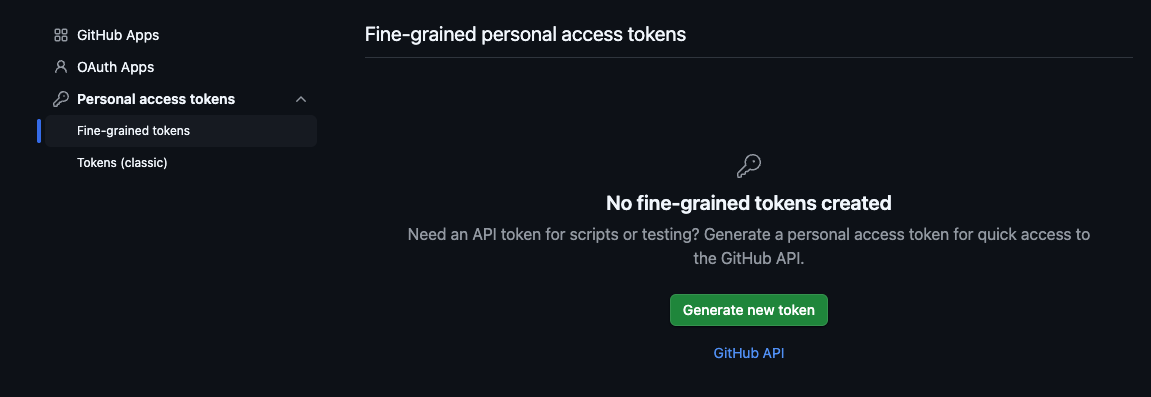
Now that you connected your GitHub account and repo to SFMCMate, it is time to connect GitHub with SFMC. For that, you need to create a personal access token.
Click here to go to your GitHub token settings.
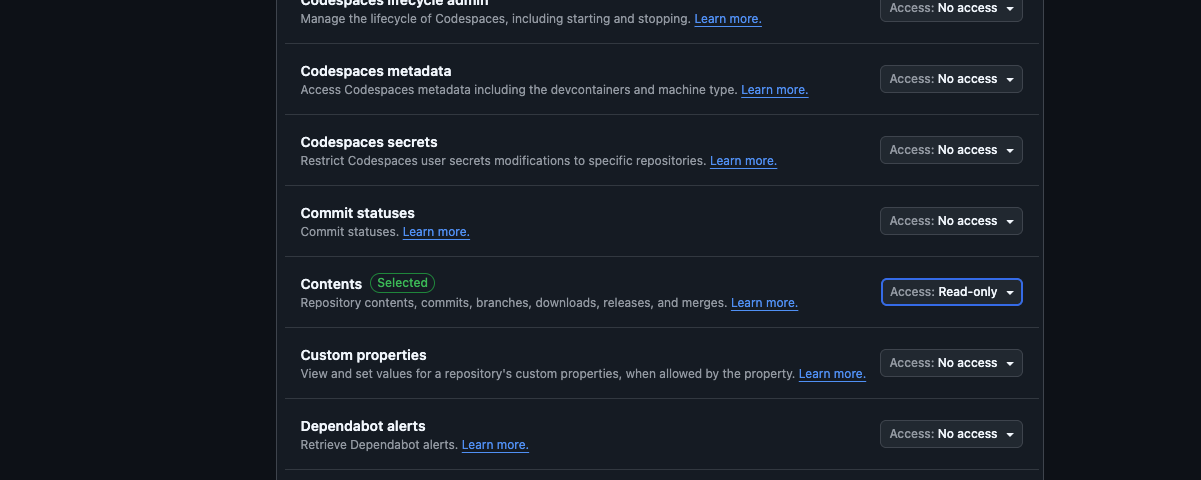
Step 9: Creating a Github token for SFMC access
Make sure to select the same repository where you installed the SFMCMate GitHub App.
After selecting the repository, scroll down to the Repository permissions section and set Contents to Read-only.
This permission allows SFMCMate to read code from your repo when deploying to CloudPages, while ensuring your repository remains secure.
Generate the token with the right permission and copy it to use it in the SFMC Setup.
Installation
SFMC Setup
Step 1: (Optional) Create the SFMCMate_Credentials Data Extension in SFMC

Create a new Data Extension called SFMCMate_Credentials in SFMC with the following fields if you will generate the code for API endpoints:
- clientId (Text, 100) - Your API integration client ID
- clientSecret (Text, 100) - Your API integration client secret
- subdomain (Text, 150) - Your SFMC subdomain
- scope (Text, 150) - Example: journey (used for Journey Builder operations)
Step 2: (Optional) Add the credentials
Create related packages and insert your API credentials into the SFMCMate_Credentials Data Extension. This DE will be used in generated code so that your credentials will not be exposed.
// Example code:

<script runat="server">
Platform.Load("Core", "1");

try {
  var credentialRows = Platform.Function.LookupRows("SFMCMate_Credentials", "scope", "journey");
  if (!credentialRows || credentialRows.length === 0) {
      Write("No credentials found for scope 'journey'.");
      return;
  }

  var clientId = credentialRows[0].clientId;
  var clientSecret = credentialRows[0].clientSecret;
  var subdomain = credentialRows[0].subdomain;

  var authUrl = "https://" + subdomain + ".auth.marketingcloudapis.com/v2/token";
  var restUrl = "https://" + subdomain + ".rest.marketingcloudapis.com/";

  var payload = {
      grant_type: "client_credentials",
      client_id: clientId,
      client_secret: clientSecret
  };

  // Code continues...
</script>
Step 3: Creating a CloudPage to retrieve code from Github repo
Copy and paste the code below into a CloudPage and replace the placeholders for username, token, repoName, and fileName with your actual values.
You can use script.js or page.html as the file name, depending on what you're deploying.
Once the CloudPage is published, any code you send from SFMCMate to GitHub will be automatically deployed — simply refresh the CloudPage to execute the code.
<script runat="server">
Platform.Load('Core', '1.1')

// Global Variables
// Change these variables according to your own settings - Use script.js or page.html based on what you will generate
var userDetails = {
         username : "your user name",
         token    : "here you put your token from Github",
         repoName : "your repo name",
         fileName : "script.js"
      }
// Do not change anything below this section
// get repo content
function getPrivateRepoContent(obj){

    //Building the request URL = https://api.github.com/repos/stackexchange/mysecretrepo/contents/code.js
    var resource = 'https://api.github.com/repos/'+ obj.username + '/' + obj.repoName + '/contents/' + obj.fileName

    var req = new Script.Util.HttpRequest(resource);
        req.emptyContentHandling = 0;
        req.retries = 2;
        req.continueOnError = true;
        req.contentType = "application/json; charset=utf-8"
        req.setHeader("Authorization","token " + obj.token);
        req.setHeader("User-Agent", obj.username + '/' + obj.repoName);
        //  This header is very important! It allows to get the file content raw version. With that we can treat the the file as content like a charm :)
        req.setHeader("Accept", "application/vnd.github.v3.raw");
        req.setHeader("Cache-Control", "");
        req.method = "GET";

    var resp = req.send();

    // Assigning the response content to a AMPScript variable
    Platform.Variable.SetValue("@runCode", resp.content)
}

//Run the function passing the user settings as parameter
getPrivateRepoContent(userDetails)
</script>

<!DOCTYPE html>
<html lang="en">
<head>
  <meta charset="UTF-8">
  <meta name="viewport" content="width=device-width, initial-scale=1.0">
  <title>Running code from Github private repositories</title>
</head>
<body>
 <!-- Getting the response from SSJS and treat as a content in the HTML -->
%%=TreatAsContent(@runCode)=%%

 </body>
</html>Usage
Token Limits
Token usage is how SFMCMate tracks the volume of content sent to AI. Each request is estimated using 1 token per 4 characters in your input and operation prompt. If an image is attached, +1000 tokens are added to the estimate.
On average, a text-only request uses around 700 tokens, while requests with an image can use 1700+ tokens depending on text length. Very short requests that are unclear or unsupported may trigger a minimal AI response like “Can you elaborate?” or “Sorry, I can only respond using...” — these still count toward your usage, typically using 100–300 tokens.
Every user has a monthly token limit, which differs based on whether they've installed the GitHub App or not.
- Installers: 90,000 tokens
- Non-installers: 50,000 tokens
This helps SFMCMate manage resource usage fairly across users.
// Token usage is estimated like this
            let estimatedTokens = Math.ceil(systemPrompt.length / 4);
            if (image) estimatedTokens += 1000;

            // Usage is tracked and saved
            await ChatUsage.logAndUpdateToken({
              userId,
              tokensUsed: estimatedTokens,
              ...
            });
Token reset timing: Token limits are reset once a month. The reset is applied only when a user logs in after their reset date. If their reset date is passed, SFMCMate sets their monthly_token_usage to 0 and extends their token_reset_date one month forward.
The token_reset_date is first set when you log in with GitHub and your user record is created in the database.
// On GitHub login:
            if (new Date(user.token_reset_date) < new Date()) {
              await User.resetToken(profile.id);
              user.monthly_token_usage = 0;
              user.token_reset_date = new Date(new Date().setMonth(new Date().getMonth() + 1));
}Usage
Operations
SFMCMate provides various operations to interact with Salesforce Marketing Cloud. Select an operation from the sidebar to learn more.
Data View Query
Query Data Views in SFMC to retrieve information about subscribers, sends, and other marketing activities.
Retrieve Journeys
Retrieve a list of journeys from Journey Builder, including status, creation date, and other metadata.
Create Data Extension
Programmatically create Data Extensions using SSJS and the SOAP API.
Form Submission
Create HTML forms with AMPscript that submit data to Data Extensions in SFMC.
Usage
Operations
Overview
Operations Overview
SFMCMate provides a set of powerful operations that allow you to automate Salesforce Marketing Cloud workflows using natural language prompts. Each operation is tightly scoped and generates clean, production-ready code.
Create Data Extension
Generate a fully customized SSJS snippet to create a Data Extension based on field details you describe.
- Define fields, types, and primary key rules
- Control length, scale, and nullability
- Output is clean SSJS only — no comments or markdown
Data View Query
Craft advanced SQL queries across supported SFMC Data Views with strict enforcement of platform-supported logic.
- Access [_Sent], [_Subscribers], [_Click], and more
- Use valid JOINs, filtering, and deduplication
- No unsupported functions — only clean SQL
Form Submission with AMPscript
Build a CloudPage-ready AMPscript + HTML form that writes data to your chosen Data Extension.
- Uses correct AMPscript format (%%[ ]%%)
- Handles required fields automatically
- Returns only valid HTML + AMPscript combo
Retrieve Journeys
Get an HTML-rendered list of your Journey Builder journeys using SSJS and REST API — with no credentials hardcoded.
- Renders journey details in a table
- Filters by name, tag, status, and more
- All credentials retrieved from DE
How Operations Work
Each operation in SFMCMate follows a consistent pipeline:
- Request: You describe what you want using natural language in the chat
- Code Generation: Based on your input and selected operation, a strictly formatted code snippet is produced
- Deployment: You can instantly push this code to GitHub via the GitHub button
- Execution: Your CloudPage dynamically loads and runs the script from GitHub when refreshed
Usage
Operations
Data View Query
Data View Query
Query Data Views in Salesforce Marketing Cloud using strict SQL generation rules. These queries help you analyze subscriber behavior, email performance, journey interactions, and more.
SELECT s.SubscriberKey, s.EmailAddress, j.JourneyName, ja.ActivityName, se.EventDate
              FROM [_Sent] se
              INNER JOIN [_Job] jb ON se.JobID = jb.JobID
              INNER JOIN [JourneyActivity] ja ON se.TriggererSendDefinitionObjectID = ja.JourneyActivityObjectID
              INNER JOIN [Journey] j ON ja.VersionID = j.VersionID
              INNER JOIN [_Subscribers] s ON se.SubscriberKey = s.SubscriberKey
              WHERE j.JourneyName = 'Welcome Series'
                AND se.EventDate > DATEADD(day, -14, GETDATE())
Supported Data Views:
- _Subscribers – Subscriber profiles and status
- _Sent – Sent email records
- _Open – Email open events
- _Click – Link click interactions
- _Bounce – Bounce categories and reasons
- _Job – Email send job metadata
- _Journey – Journey metadata
- _JourneyActivity – Journey activity metadata
Strict SQL Rules:
- Only use SELECT, JOIN, WHERE, GROUP BY, HAVING, and ROW_NUMBER
- No INSERT, UPDATE, DELETE, or unsupported functions like EOMONTH
- Always alias your tables and wrap them in square brackets: [DataView]
- De-duplicate with subqueries using ROW_NUMBER()
- Date filtering must use GETDATE() or GETUTCDATE() with DATEADD()
Example Prompts:
- "Create a query to find all subscribers who opened emails in the last 30 days"
- "Show me a SQL query to find the top 10 most clicked links in our newsletters"
- "Write a query to find all bounced subscribers"
- "Generate SQL to find all subscribers who opened but didn't click emails in the Welcome Journey"
Usage
Operations
Retrieve Journeys
Retrieve Journeys
This operation was created primarily to demonstrate how to securely retrieve Salesforce Marketing Cloud credentials from a Data Extension without hardcoding or exposing them. While the journey retrieval UI is not fully implemented yet, it lays the foundation for advanced REST API usage.
<script runat="server">
              Platform.Load("Core", "1");

              try {
                var rows = LookupRows("SFMCMate_Credentials", "scope", "journey");
                var clientId = rows[0].clientId;
                var clientSecret = rows[0].clientSecret;
                var subdomain = rows[0].subdomain;

                var tokenUrl = "https://" + subdomain + ".auth.marketingcloudapis.com/v2/token";
                var payload = {
                  grant_type: "client_credentials",
                  client_id: clientId,
                  client_secret: clientSecret
                };

                var response = HTTP.Post(tokenUrl, "application/json", Stringify(payload));
                var token = Platform.Function.ParseJSON(response.Response[0]).access_token;

                Write("Token retrieved successfully without exposing credentials.");
              } catch (e) {
                Write("Error: " + Stringify(e));
              }
              </script>
Supported Query Parameters for Future Implementation:
- $page (Number): Page number to retrieve. Default =
1 - $pageSize (Number): Number of results per page. Default and max =
50 - $orderBy (String): Sort order. Valid columns:
ModifiedDate,Name,Performance. Directions:ASC,DESC. Default:ModifiedDate DESC - status (String): Filter by journey status:
- Draft
- Published
- ScheduledToPublish
- Stopped
- Unpublished
- Deleted
- ScheduledToSend
- Sent
- versionNumber (Number): Specific journey version to retrieve. Defaults to latest published.
- specificApiVersionNumber (Number): Filters by
workflowApiVersion. Default =1 - mostRecentVersionOnly (Boolean): Set to
trueto retrieve only the latest version - definitionType (Enum): Journey type, e.g.
transactional - nameOrDescription (String): Search string for journey name or description
- extras (String): Additional data to include. Options:
- all
- activities
- outcome
- stats
- tag
- tag (String): Filter by tag name
Example Prompts:
- "Retrieve all active journeys"
- "Retrieve journeys created in last 30 days"
- "Retrieve journey details including activities and stats"
Usage
Operations
Create Data Extension
Create Data Extension
This operation is built to strictly enforce rules when creating Data Extensions via SSJS in SFMC. It ensures no placeholder fields are reused and credentials or logic are never exposed outside the defined behavior.
<script runat="server">
              Platform.Load("core", "1");

              var api = new Script.Util.WSProxy();

              try {
                var fields = [
                  // Populate this based on user request
                  // Example:
                  {
                    "Name": "Email",
                    "FieldType": "EmailAddress",
                    "IsRequired": true,
                    "IsPrimaryKey": true,
                    "MaxLength": 254
                  },
                  {
                    "Name": "Age",
                    "FieldType": "Number"
                  }
                ];

                var config = {
                  "CustomerKey": Platform.Function.GUID(),
                  "Name": "MyDataExtension",
                  "Fields": fields
                };

                var result = api.createItem("DataExtension", config);

                if (result && result.Results && result.Results.length > 0) {
                  var statusCode = result.Results[0].StatusCode;
                  var statusMessage = result.Results[0].StatusMessage;

                  if (statusCode === "OK") {
                    Write("Success: " + statusMessage);
                    Write("</br>");
                  } else {
                    Write("Error: " + statusMessage);
                    Write("</br>");
                  }
                } else {
                  Write("Error: Unexpected response structure.");
                }
              } catch (error) {
                Write("Exception: " + Stringify(error));
              }
              </script>
Supported Field Rules:
- IsPrimaryKey fields must also include
IsRequired: true - By default, fields are optional and not primary keys unless explicitly stated
- No default fields (e.g. Email, SubscriberKey) unless the user requests them
- No trailing commas in arrays or objects
Supported Field Types:
- Text — Default MaxLength = 100
- Decimal — Default MaxLength = 18, Scale = 2
- Number
- Date
- Boolean
- EmailAddress
- Phone
- Locale
Example Prompts:
- "Create a data extension called 'Newsletter_Subscribers' with email, first name, and subscription date"
- "Make a DE for product orders with order ID as primary key, product name, quantity, and price fields"
- "Create 3 data extensions, here are the names and fields..."
Usage
Operations
Form Submission
Form Submission with AMPscript
This operation generates HTML forms with AMPscript that can be used on CloudPages to collect and store data in SFMC Data Extensions. The generated code handles form validation, submission, and success/error messaging.
This operation generates a combined AMPscript + HTML form to be published on CloudPages. It follows strict formatting rules to ensure the output remains clean, secure, and fully compatible with Salesforce Marketing Cloud form processing.
%%[
                if RequestParameter("submitted") == true then

                  SET @FirstName = RequestParameter("firstname")
                  SET @Email = RequestParameter("email")
                  SET @Age = RequestParameter("age")

                  Set @newRegistration = InsertData(
                    "Registrations",
                    "FirstName", @FirstName,
                    "Email", @Email,
                    "Age", @Age
                  )

                endif
                ]%%

                <!DOCTYPE html>
                <html>
                  <body>
                    %%[ if RequestParameter("submitted") == true then ]%%
                      <p>Thank you for registering!</p>
                    %%[ else ]%%
                    <h2>Registration Form</h2>
                    <form action="%%=RequestParameter('PAGEURL')=%%" method="post">
                      <label>First Name:</label>
                      <input type="text" name="firstname"><br><br>

                      <label>Email:</label>
                      <input type="email" name="email" required><br><br>

                      <label>Age:</label>
                      <input type="number" name="age"><br><br>

                      <input name="submitted" type="hidden" value="true" />
                      <input type="submit" value="Submit">
                    </form>
                    %%[ endif ]%%
                  </body>
                </html>
Strict Form Logic:
- AMPscript must start with %%[ and end with ]%% — Outline format only
- IF statements use
thenand must be closed withendif - DataExtension name defaults to
Registrationsunless changed by the user - Fields are extracted from form inputs and passed to
InsertData() - Only field names, types, and HTML may be changed based on the user prompt
Example Prompts:
- "Create a newsletter signup form with fields for name, email, and interests"
- "Make a contact form that saves to a Data Extension called 'Website_Inquiries'"
- "Create a feedback form with rating, comments, and email fields that shows a thank you message after submission"
Release Notes
Stay up-to-date with the latest features, improvements, and bug fixes in SFMCMate.
SFMCMate is in active development — your feedback helps shape what’s next.
v1.0.0
Highlights
- Initial public release
- Core functionality for SFMC-GitHub integration